Sunday, December 7, 2025

Blueberry Cheesecake Swirl Cookies

by


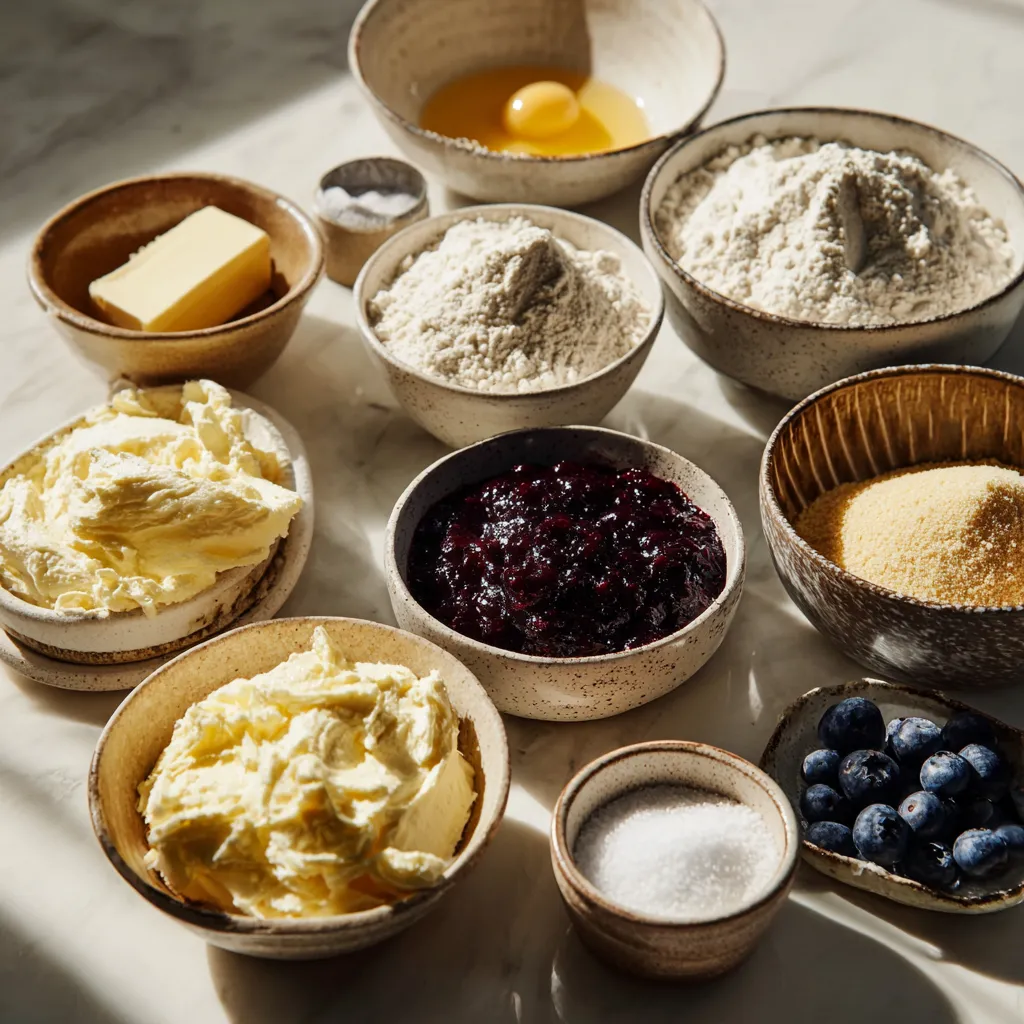
Blueberry Cheesecake Swirl Cookies combine the richness of cheesecake with the fruity sweetness of blueberries, all swirled into a soft, chewy cookie. These delightful treats are perfect for satisfying your sweet tooth cravings and are a beautiful addition to any dessert table.

Ingredients

  • 2½ cups all-purpose flour
  • 1 teaspoon baking soda
  • ½ teaspoon baking powder
  • ¼ teaspoon salt
  • ¾ cup unsalted butter, softened
  • 1 cup granulated sugar
  • ½ cup brown sugar
  • 2 large eggs
  • 2 teaspoons vanilla extract
  • 4 oz (115 g) cream cheese, softened
  • 3 tablespoons sugar
  • ½ teaspoon vanilla extract
  • ½ cup blueberry jam or pie filling

Instructions

  1. In a small bowl, mix cream cheese, 3 tablespoons sugar, and ½ teaspoon vanilla. Beat until smooth and creamy. Refrigerate while preparing the cookie dough.
  2. In a bowl, whisk together flour, baking soda, baking powder, and salt.
  3. In another bowl, cream butter, granulated sugar, and brown sugar until light and fluffy (2–3 minutes).
  4. Add eggs one at a time, mixing well. Add vanilla.
  5. Add the dry ingredients to the wet mixture and mix just until combined. Chill dough for 30 minutes.
  6. Drop spoonfuls of chilled cheesecake filling over the cookie dough. Add small spoonfuls of blueberry jam.
  7. Gently fold with a spatula 2–3 times — do NOT overmix. You want visible blueberry and cheesecake streaks.
  8. Preheat oven to 350°F (175°C). Line a baking sheet with parchment paper. Scoop large balls of dough (2–3 tbsp each) onto the tray.
  9. Bake 11–13 minutes, until edges are set and centers look slightly underbaked. Let cool on the tray for 10 minutes before transferring.

Variation

  1. Try different fruit jams like raspberry, strawberry, or apricot for alternative flavors.
  2. Add a hint of lemon zest to the cheesecake filling for a citrusy twist.
  3. Incorporate white chocolate chips for added sweetness and texture.

Cooking Notes

  1. Do not overmix the blueberry and cheesecake fillings into the dough.
  2. Chilling the dough is crucial for preventing spreading during baking.
  3. Ensure the cream cheese is softened for easy mixing.

Serving Suggestions

  1. Serve with a scoop of vanilla ice cream for a richer dessert.
  2. Pair with a cup of tea or coffee for a delightful afternoon treat.
  3. Dust with powdered sugar for a bakery-style presentation.

Tips

  • Use cold cheesecake filling for the most defined swirl in your cookies.
  • If using homemade blueberry jam, ensure it is thick enough to hold its shape when baking.
  • Allow cookies to cool completely before transferring to a wire rack to prevent breakage.

Prep Time

  • Prep Time: 20 minutes
  • Cook Time: 13 minutes
  • Total Time: 1 hour

Nutritional Information (Per Cookie)

  • Calories: 150 kcal
  • Protein: 2g
  • Sodium: 95mg

Frequently Asked Questions

  1. Can these cookies be frozen?
    Yes, freeze the dough balls before baking for up to 3 months.
  2. What type of jam works best for this recipe?
    Store-bought or homemade blueberry jam works well as long as it’s thick.
  3. Can I make the dough in advance?
    Yes, refrigerate for up to 24 hours before baking.
  4. How should I store leftovers?
    Keep baked cookies in an airtight container for up to 5 days.

Conclusion

Blueberry Cheesecake Swirl Cookies are the perfect combination of creamy cheesecake flavor and sweet blueberry filling enveloped in a soft cookie shell. These delicious treats are not only visually stunning but also delightfully tasty. Enjoy them fresh from the oven or as a quick sweet snack, they’re bound to become a household favorite, offering both comfort and elegance in every bite.

Baked Parmesan Potato Fries

by


When it comes to comfort food, few dishes are as beloved as French fries. While traditional deep-fried fries are often considered an indulgence, there’s a healthier, yet equally tasty alternative: Baked Parmesan Potato Fries. Not only do they provide a crisp exterior and fluffy interior, but they also come packed with a cheesy, savory flavor that elevates the simple potato to new culinary heights. This recipe is perfect for those looking for a healthier option without compromising on taste.

Why Baked Fries Are Healthier
The primary difference between baked fries and their deep-fried counterparts is the cooking method. By baking the fries, you significantly reduce the amount of oil needed, which in turn cuts down on unnecessary fats and calories. These baked fries provide all the crunch and flavor you expect from a classic fry without the guilt.

The Role of Parmesan in Enhancing Flavor
Incorporating Parmesan cheese into the recipe not only adds depth of flavor but also introduces a unique crispy texture to the fries. As the cheese melts and bakes, it forms a golden crust, further enhancing the crispy exterior of the fries. The nutty, salty flavor of Parmesan pairs perfectly with the earthy richness of the potatoes, creating a snack or side dish that feels indulgent while remaining nutritious.
Discover more
salty
Potato chips
Cheese
Steak
Casserole
French
French cuisine
Potatoes
Parmesan
crisp

Ingredients for Baked Parmesan Potato Fries
The ingredients for this recipe are simple and likely already in your kitchen. Here’s what you’ll need to get started:

Ingredient Quantity
Medium-sized potatoes (peeled) 3
Salt (to taste) –
Black pepper (to taste) –
Mayonnaise 1 tablespoon (15 grams)
Grated Parmesan cheese 50 grams (1.7 oz)
Servings: 3 to 4
Prep and Cook Time: 35 minutes


Step-by-Step Recipe for Baked Parmesan Potato Fries
1. Preheat Your Oven
Preheat your oven to 200°C (400°F). This temperature ensures the fries will get that golden, crispy exterior while remaining soft inside.

2. Slice the Potatoes
Peel the potatoes and slice them into thin strips, about 1 cm (0.4 inches) thick. Try to maintain uniformity in size, as this allows the fries to cook evenly. You don’t want some fries to burn while others remain undercooked.

3. Season the Potatoes
Place the potato slices in a large bowl. Add a tablespoon of mayonnaise, which helps the Parmesan cheese stick to the fries while contributing flavor without the need for excessive oil. Season with salt and black pepper to taste, tossing the fries to ensure they are evenly coated.

4. Add Parmesan Cheese
After seasoning, sprinkle the grated Parmesan over the fries. Toss them again to ensure that the cheese is evenly distributed, coating each fry. The Parmesan cheese will bake into a deliciously crunchy coating that enhances both flavor and texture.

5. Arrange the Fries on a Baking Tray
Line a baking tray with parchment paper or lightly grease it to prevent sticking. Arrange the potato slices in a single layer, ensuring they are not overlapping. Overcrowding the tray can lead to uneven cooking, as the fries need space for the hot air to circulate around them.

6. Bake the Fries
Place the baking tray in the oven and bake for 20-25 minutes, or until the fries are golden brown and crispy. About halfway through the cooking time, flip the fries to ensure even browning on both sides.

7. Serve Hot
Once the fries are crispy and golden, remove them from the oven and let them cool for a couple of minutes. Serve immediately while they’re still hot for the best texture and flavor.

Crescent Reuben Bake: A Slice of Sunday Comfort

by


 Savory, satisfying, and deeply nostalgic—this is supper, perfected. Born from Depression-era ingenuity and perfected in Midwest church basements, this casserole turns pantry staples into pure gold. The crescent dough rises into a golden crust; the corned beef and sauerkraut meld into tender layers; the cheese pulls like a blessing. And best of all? It’s ready in 30 minutes—perfect for busy weeknights or unexpected guests.

✨ Best of all? Naturally freezer-friendly, endlessly adaptable, and always the first to vanish at potlucks.

“Layer, bake, and serve love.”

Why You’ll Love This Recipe

✓ Only 8 humble ingredients—pantry staples, no fancy trips

✓ 10 minutes hands-on—ideal for tired evenings or last-minute suppers

✓ Naturally comforting—feeds a crowd with minimal effort

✓ Freezer-friendly—assemble, freeze, bake later

✓ Kid-approved & elder-welcomed—comfort in every forkful

Perfect for:

• Weeknight dinners or Sunday suppers

• Church potlucks or funeral meals (the kind people request by name)

• Leftover magic (makes the best next-day hash!)

• Filling that “Heirloom Hotdishes” chapter in your recipe book

Ingredients


see continuation on next page

Ingredients

Serves 8


The Heart of the Bake


2 (8 oz) cans refrigerated crescent roll dough (not “sheets”—you need the perforated triangles!)

1 lb corned beef, thinly sliced or shredded (deli-sliced works—ask for “extra tender”!)

8 slices Swiss cheese (not pre-shredded—slices melt smoother!)

1½ cups sauerkraut, well-drained and patted dry (key for no soggy crust!)

½ cup Thousand Island dressing (homemade or store-bought—Kraft is classic!)

The Golden Finish


1 large egg, beaten with 1 tbsp water

1 tsp caraway seeds (optional but so Joye—for your bold-flavor love!)

Optional: Pinch of onion powder rubbed into sauerkraut

✅ Joye’s Pro Tips


Drain sauerkraut overnight: Press in a colander with a weighted plate. Pat dry with paper towels—moisture is the enemy of crisp crust!

Warm the corned beef: Microwave 30 seconds before layering—helps flavors meld.

Seal the dough: Pinch edges like pie crust—keeps filling from oozing.

Step-by-Step Instructions

1. Prep & Preheat

→ Preheat oven to 375°F (190°C).

→ Lightly grease a 9×13-inch baking dish with butter or nonstick spray.


2. Build the Base (The Quiet Foundation)

→ Unroll one can of crescent dough; press into the bottom of the dish, sealing perforations with your fingers.

→ Layer 4 slices Swiss cheese over dough (tuck edges under to prevent burning).


3. Layer with Love

→ Spread corned beef evenly over cheese.

→ Scatter drained sauerkraut (and onion powder, if using) in a tight layer.

→ Drizzle Thousand Island dressing like rain over the sauerkraut.

→ Top with remaining 4 slices Swiss cheese.


4. Seal & Shine

→ Unroll second can of crescent dough; place over filling.

→ Pinch edges firmly to seal (no gaps!).

→ Brush top with beaten egg; sprinkle with caraway seeds.


5. Bake to Golden Perfection

→ Bake 25–30 minutes, until:

✓ Top is deep golden-brown and puffed

✓ Filling bubbles gently at the edges

✅ Pro tip: Tent with foil at 20 minutes if top browns too fast.


6. Rest & Serve

→ Let rest 5 minutes (filling sets—no runny slices!).

→ Cut into squares with a sharp knife.

→ Serve warm—never cold (this is a hotdish!).


Tips for Perfect Bake (Joye-Approved!)

🔸 Drain sauerkraut like your peace depends on it. Wet kraut = soggy bottom crust.

🔸 Don’t skip the egg wash. It gives that bakery-style shine and crispness.

🔸 Use deli corned beef. Canned is too salty; leftover brisket works in a pinch.

🔸 Caraway seeds are non-negotiable. They’re the soul of a true Reuben.

🔸 Say “Ready?” before serving. It’s not superstition—it’s ritual. And rituals make food taste better.


Serving Suggestions (Joye’s Favorites!)

🥔 Classic pairing: Buttered egg noodles or dill pickle spears

🥗 Brunch darling: With a simple green salad and rye toast points

🍎 Midwest touch: Sliced apples or spiced applesauce on the side

🫖 Comfort finish: Hot tea, spiced cider, or cold milk

Storage & Make-Ahead Tips

Fridge (unbaked): Assemble, cover, refrigerate up to 24 hours. Bake +5 mins.

Fridge (baked): Up to 3 days. Reheat covered at 325°F (15–20 mins).

Freezer (unbaked): Assemble (no egg wash), cover tightly, freeze. Thaw overnight, add egg wash, bake +10 mins.

Freezer (baked): Slice, wrap individually, freeze. Thaw overnight, reheat 20 mins @ 350°F.

Frequently Asked Questions

Q: Can I use leftover corned beef brisket?

A: Yes! Chop finely and warm in 2 tbsp broth before layering.


Q: Why is my bottom crust soggy?

A: Likely under-drained sauerkraut. Next time: squeeze kraut in a clean towel until no liquid drips.


Q: Can I make it gluten-free?

A: Yes! Use GF crescent dough (like Pillsbury GF) and verify corned beef is GF.


Q: Can I skip the Thousand Island?

A: Not recommended—it’s the glue that binds the Reuben soul! But mix 3 tbsp mayo + 2 tbsp ketchup + 1 tsp relish in a pinch.


Q: Are caraway seeds essential?

A: For authenticity—yes! They’re the secret that makes it taste like a deli. Find them near spices.


Allergy Information

Contains: Dairy (cheese, butter in dough), eggs, wheat, soy (in dressing)

Gluten-free option: Yes—with GF dough & verified GF ingredients

Nut-free: Yes (naturally)

⚠️ Always verify ingredient labels.

Nutrition Facts (Per Serving — 8 servings)

| Calories | 480 |

| Protein | 24g |

| Fat | 28g |

| Saturated Fat | 12g |

| Carbs | 32g |

| Fiber | 2g |

| Sugar | 5g |

| Sodium | 1,420mg |

Values are estimates. Varies by brands and cheese type.


Final Thought

This bake doesn’t arrive with fanfare.

It bakes quietly in the oven—butter melting into dough, sauerkraut softening into gold—until the kitchen smells like memory and mercy.


You scoop a square. The top cracks under your fork. The filling steams—tangy, rich, deeply familiar.

And someone at the table sighs and says:


“This tastes like home.”


That’s the Midwest way—not perfection, but presence.

Not abundance, but enough.

Not haste, but care.

Makes Any Plant Bloom Quickly (I Never Thought It Would Be This Fast)

by


 A Powerful Homemade Fertilizer to Make Any Plant Bloom Quickly

For plant lovers who long to see their flowers bloom vibrantly, there’s a simple and effective solution that can be prepared right at home. Whether you’re caring for desert roses, azaleas, violets, or ornamental plants like zamioculcas, this organic fertilizer can stimulate blooming in a surprisingly short time.

Many gardeners struggle to get their plants to flower despite regular care and watering. Often, the issue lies not in how the plant is treated, but in the absence of specific nutrients needed to trigger flowering. Plants, like all living things, need proper nourishment—not just to survive, but to thrive and bloom.

This article introduces a potent and natural flowering booster using a well-known organic fertilizer: castor cake (also known as castor bean meal). Rich in essential nutrients like nitrogen, potassium, boron, vitamins, and mineral salts, castor cake stimulates flower bud formation and promotes healthy and consistent blooming.

Why Castor Cake Works
Castor cake is an organic by-product of castor oil extraction. It contains high levels of nitrogen and other micronutrients that feed the soil and nourish plants. This fertilizer enhances root development and stimulates plants to transition from vegetative growth to blooming.

Unlike synthetic fertilizers, which can sometimes stress plants or harm beneficial microbes in the soil, castor cake is gentle and sustainable. It gradually releases nutrients, improving both the plant and the soil’s health over time.

How to Prepare the Fertilizer Solution
Ingredients:

2 liters of water
4 tablespoons of castor cake (castor bean meal)

Instructions:

see continuation on next page

In a clean container, pour 2 liters of water.
Add 4 tablespoons of castor cake to the water.
Mix thoroughly until the fertilizer is well-dissolved or evenly suspended in the water.
This liquid solution can be used to water the base of the plant or applied as a foliar spray, depending on the plant’s needs.

Application Guidelines
Frequency: Apply once every 7 days.
Ideal for: Flowering plants such as desert roses, azaleas, violets, anthuriums, and ornamental shrubs.
Additional Benefit: This mixture is also effective for pepper plants and other fruiting plants that benefit from strong flowering before fruit set.
Practical Results in Just 10 Days
Gardeners who use this technique report visible results in as little as 10 days. In one example, a gardener applied the castor cake solution to a desert rose that had previously struggled to bloom. After consistent weekly application, the plant began producing buds and soon showcased stunning flowers.

Even plants that appear weak or neglected can recover and begin blooming when fed with this organic fertilizer. Another case involved a desert rose that looked sickly and poorly maintained. With care and regular use of the castor cake mixture, the plant began to show signs of recovery and soon produced its first blooms.

Bonus Tip: Tomato-Based Fertilizer
For even more flowering power, gardeners can supplement their routine with a homemade tomato-based fertilizer. Tomatoes contain natural compounds that support flowering and fruiting. When used in combination with the castor cake mix, the results can be even more impressive.

Final Thoughts
Flowering plants require more than just water and sunlight—they need targeted nutrition. Feeding your plants the right combination of organic nutrients can dramatically improve their blooming potential. Castor cake is an affordable, widely available, and highly effective organic fertilizer that every gardener should consider using.

By dedicating a small amount of time each week to prepare and apply this natural booster, any plant can reward you with rich, colorful, and abundant blossoms. Whether you’re a seasoned gardener or just getting started, adding castor cake to your gardening routine can make all the difference.

Try it, be consistent, and watch as your plants transform with lush, beautiful flowers that brighten your home and garden.


Many people grow the “money tree” at home. But here is what few people know about this plant.

by


 According to Feng Shui, the money tree is a plant that brings success, prosperity, and wealth. But few people know that this plant has an additional benefit: natural health properties.

This tree is said to be an indicator of a person’s health. It is even believed that when it begins to wither, it is because it is absorbing the negative energy carried by one of the people living in the home, usually when they are sick.

However, when the person recovers from the illness, the money tree is reborn and greens again, beginning to shine with health. On an energetic level, there is a remarkable connection between people and this incredible plant.

Properties of the Money Tree

In traditional medicine, a remedy made with the juice of the leaves of this plant is widely used. This is due to its anti-inflammatory, antiviral, and high flavonoid and bactericidal properties.

Crassula is a famous green competitor that, in terms of medicinal properties, is compared to Aloe vera.

Although it is established as a natural medicine, crassula use should only be external and with caution.

The reason for caution is that it has the ability to accumulate arsenic. However, in houseplants, this ability is reduced because the soil in which they grow is poor or non-arsenic compared to wild plants in Africa or Asia.


see continuation on next page

Calluses
The leaves of money trees are known as calluses. Although, oddly enough, “callus” is a very popular name for this plant.

Before applying it, you must remove the transparent fabric from the surface of the leaf. Then, stick the leaf over the callus, secure it with a bandage or adhesive patch, and leave it overnight.

It can also be used on burnt areas, but only on minor burns without blisters.

Bruises, Cuts, and Scrapes
Make a paste with the leaves of the plant. Apply it to the affected area of skin. Then, secure it with a bandage.

When the paste dries, after about two hours, carefully clean it, apply more paste, and change the bandage.

Cold Cold Sores
The juice from the leaves can be used to treat cold sores. How to do it? Squeeze the washed leaf of the money tree, extract the juice, and apply the juice to the affected area. You can apply it directly or soak a cotton ball or swab in it and place it on the affected area.

Insect Bites
Another use for the juice from the leaves of the money tree is to apply it to insect bites. Do this every two hours. This reduces inflammation and makes the bite disappear quickly.

Acne
Thanks to its anti-inflammatory and antiseptic properties, this plant can help clear acne, an unpleasant problem for all those who suffer from it.

If acne is just beginning, and you only have small breakouts, cleaning the affected area with freshly squeezed juice from the plant is more than enough. This procedure is more effective when applied at night.

Contraindications:
Despite its many positive properties, the use of the money tree has its own contraindications. The juice and tincture of this plant are not recommended for breastfeeding or pregnant women, or for children under 12 years of age.

If used responsibly and correctly, it is a beautiful plant that will not only decorate your apartment but will also provide wonderful health benefits.

The most important thing is to follow the recommendations regarding its use to the letter. And don’t forget to take into account the contraindications.


Boiled Eggs vs. Fried Eggs: Which Is Better for Breakfast?

by


 Eggs are one of the most popular choices for breakfast around the world. They are quick to cook, rich in protein, and keep you feeling full for hours. But when it comes to preparing them, many people wonder: is it better to eat boiled eggs or fried eggs in the morning? Let’s take a closer look at the health benefits, calorie differences, and overall impact on your daily energy.
The Case for Boiled Eggs

Boiled eggs are considered one of the healthiest ways to enjoy this versatile food. Since they are cooked without oil or butter, they are naturally low in calories and fat. A large boiled egg contains around 70 calories and 6 grams of protein, making it an excellent option for those watching their weight or looking to maintain lean muscle.

Another benefit of boiling is nutrient retention. The gentle cooking process helps preserve important vitamins such as vitamin B12, vitamin D, and choline, which play a vital role in brain function and metabolism. Boiled eggs are also rich in antioxidants like lutein and zeaxanthin, which support eye health.

In addition, boiled eggs are portable and convenient. You can prepare them in advance, store them in the fridge, and grab one on your way to work or school. For people with busy mornings, this is a simple and nutritious solution.
The Case for Fried Eggs

Fried eggs are delicious and satisfying. Cooking eggs in a pan allows you to enjoy a softer texture and richer flavor. They pair perfectly with toast, vegetables, or even a traditional breakfast plate with beans and potatoes.

However, the health impact of fried eggs depends heavily on the cooking method. If you fry your eggs in a small amount of olive oil or avocado oil, they can still be a healthy option. But frying with a lot of butter or unhealthy oils may increase saturated fat and calories, which is not ideal for heart health.
see continuation on next page

On average, a fried egg cooked with oil contains about 90–100 calories. This is slightly higher than a boiled egg, but still relatively low compared to many other breakfast options such as pastries or processed cereals.

Which One Should You Choose?

The answer depends on your personal health goals and lifestyle. If you are trying to lose weight, lower cholesterol, or reduce fat intake, boiled eggs are the better choice. They are lean, easy to digest, and provide long-lasting energy.

If you value taste, texture, and variety, fried eggs may be more appealing. Just remember to cook them with minimal oil and pair them with healthy sides such as whole-grain bread, avocado, or sautéed vegetables.

For the best of both worlds, you can also combine methods—boil some eggs for snacks throughout the week, and enjoy fried eggs occasionally when you want a more indulgent breakfast.